SwanRobotics received a mail from Ryland Research Limited. At the fire fighting robot page there is a link to their website. They changed the URL of their website so they asked me to change it. Of course I was happy to do this. If you any comment on my site or if you have a question please let me know and use the contact form.
Author: swanrobotics
-
New project with Arduino
Today I published a small project to measure voltage with an Arduino. This has great use for checking the battery of your mobile robot.
See https://swanrobotics.com/projects/voltagedivider/ for the article. -
Resistor tool page added
Today I added a page with a resistor color coding explanation. If you need a resistor use this sheet for finding the right resistor. You can find this sheet in Tools in the left menu.
-
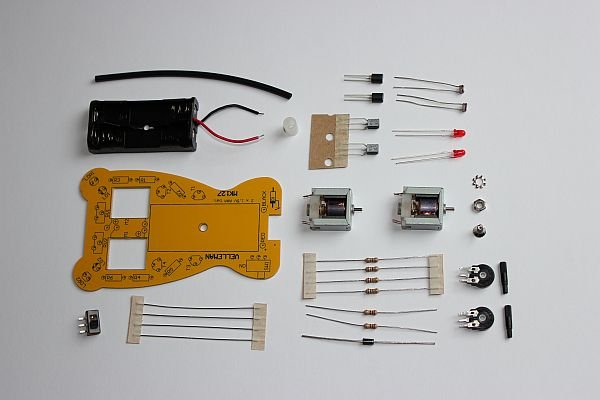
Microbug
The holiday last week gave me the opportunity to shop in a little electronics, RC and other things store. I bought a microbug kit (MK127) from Velleman for almost 12 Euro. After doing complex robot things it was time to do a simple project and make my kids enthusiastic about robotics.
The electronics basically exists of two separate circuits each driving a motor to make sure the microbug is moving towards the light. The kit contains everything you need make this microbug work except for the batteries. You need a soldering iron, a screwdriver and a file.

I didn’t like the instruction because it’s a little bit messy, but everything is on there. Just place the components on it from small to big and use the soldering iron. The tricky thing is mounting the motors.
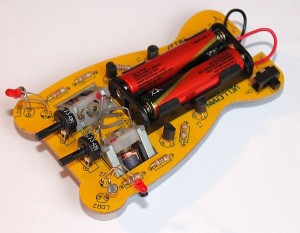
They need to be roughened after which you can fix them with solder. Make sure you mount them with the right side up, because I didn’t. The polarity of the motors was switched and the microbug was moving away from the light. Also funny ofcourse, but this was not the expected result. When the motors are fixed it’s not easy to remove them again.

I didn’t rotate them and used gray wire to make the right connections. Those gray wires just look there tiny brain.
If you have a little experience in soldering you should be able to make it work under one hour. After that you can let the kids in with their flashlight. Of course after you tested it yourselves.
-
Published Article on Fritzing.org
The Arduino wireless APC220 project is now published on http://Fritzing.org to share it to a broader public. See http://fritzing.org/projects/wireless-arduino-with-apc220.
-
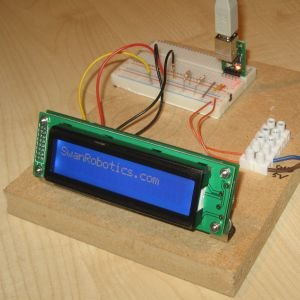
Display test project
Today I published an article about a test with the Matrix Orbital LK202-25-WB display. In this test the display is connected to the Devantech USB-I2C module. This module is connected with a PC running Linux. You can find the article under projects.
-

GPS project added
To know where the robot is in the outside world I want to mount a GPS receiver on the ‘head’ of the robot. I wrote an article about using a GPS receiver in combination with gpsd and GpsDrive to show where the robot is. You can find this projects at the Project menu.
-
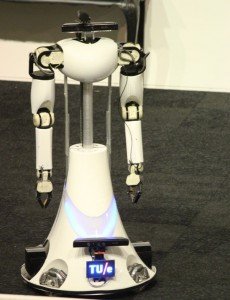
Robocup Dutch Open 2012
Today was the start of the Robocup Dutch Open 2012. A five day event with demonstrations and competions from robot builders over the world. Below a few pictures from this event.
Nao

AMIGO Robot from the TU Eindhoven in the @Home League at the Robocup Dutch open 2012.
Aibo

Soccer Robots


Pleo

-

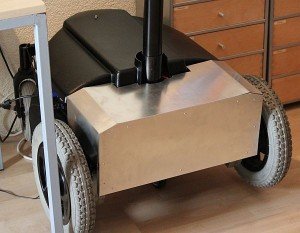
New Cover
The telepresence robot needed a cover on the front end of the robot. This was completely made of sheets and profiles of aluminum. I used rivets to fix the sheets to the profiles. This cover needs still a little bit of black paint, but the dust and other dirt is staying outside.
-
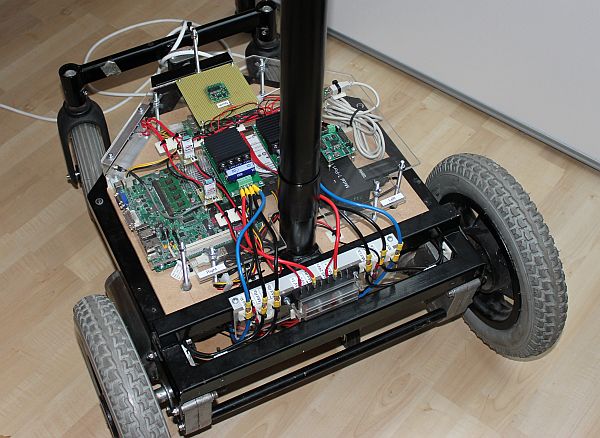
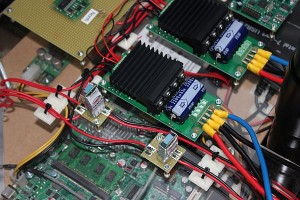
Telepresence robot pictures
I made some pictures of my telepresence robot so far. The covers are not on to let you see the inside. I used this pictures also at the telepresence robot project page.