Wow. Time flies when you having fun. This website is about my the things I build in my free time. Last 2 years where very intense at work and in my private life. Now I decided to work less, to put more time in building robots and at first finish my inMoov robot.
After the crash on the floor and all the broken pieces the robot in the same state where I left off before my last post. The first thing to do was finishing the Eye Mechanism of my inMoov robot.
In the designs of the inMoov robot (www.inMoov.fr) you can add small camera’s. In this stage I don’t want to use these yet, so I will use an round piece of 3D printed plastic to cover the hole in the eye. I also want to keep the inMoov robot as robot like as it can be at the moment. So I don’t bother to make the eye as realistic as it can be.
I made a video of the build on my YouTube channel.
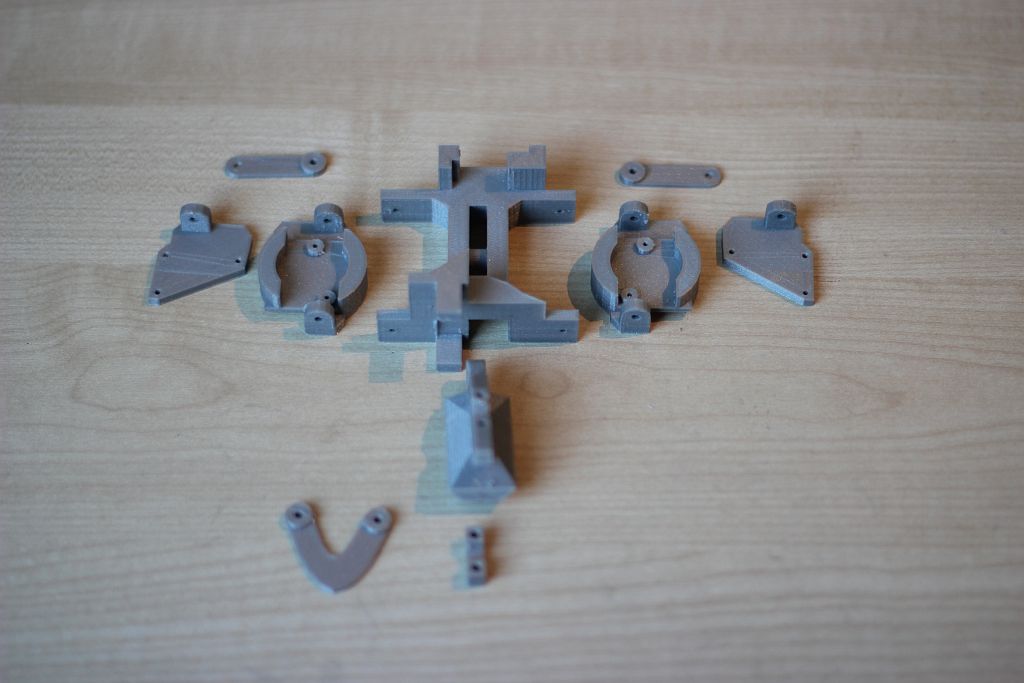
The Eye mechanism has some small parts.On the picture below you can see the standard parts.
The parts fitted nicely. The only thing that not fit directly was the EyeHingeCurve. Probably because I used an other servo than Gael Langevin did in his design. I had to adjust the hinge with a knife 😉


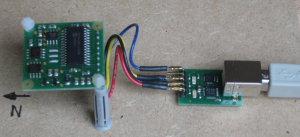
The final eye Mechanism.

In the Youtube video I used a small test code in arduino to move the eyes. You can use this code to test your own servo. In this example the servo’s are connected to a Arduino Mega on pin 22 and 24. Please change the value’s to your needs.
/* Based on the Sweep example
 by BARRAGAN <http://barraganstudio.com>
 This example code is in the public domain.

modified 8 Nov 2013
 by Scott Fitzgerald
 http://arduino.cc/en/Tutorial/Sweep

Modified to control Eye mechanism inMoov robot (With Arduino Mega)
 https://swanrobotics.com
 */

#include <Servo.h>

Servo horServo; // Horizontal servo (left tot right)
 Servo verServo; // Vertical servo (Up and down)

// Change these settings to your own setup and preferences.
 int horServoPin = 22;
 int horMaxLeft = 60; // Maximum servo position Left
 int horMid = 90; // Middle servo position horizontal
 int horMaxRight = 120; // Maximum servo position Right
 int horStep = 1; // Step size for position horizontal

int verServoPin = 24;
 int verMaxUp = 45; // Maximum servo position Up
 int verMid = 65; // Middle servo position vertical
 int verMaxDown = 95; // Maximum servo position Down
 int verStep = 1; // Step size for position vertical

int delaySpeed = 500; // time between the movement
 int pos = 0; // variable to store the servo position
 int positionwait = 5; // variable to wait for the servo to reach the position

void setup()
 {
 horServo.attach(22); // attaches the servo on horzontal pin
 verServo.attach(24); // attaches the servo on vertical pin

horServo.write(horMid); // Put horizontal servo in neutral position
 verServo.write(verMid); // Put vertical servo in neutral position
 }

void loop()
 {

// Look right
 for(pos = horMid; pos <= horMaxRight; pos += horStep)
 {
 horServo.write(pos);
 delay(positionwait);
 }
 delay(delaySpeed);

// Look left
 for(pos = horMaxRight; pos>=horMaxLeft; pos-=horStep)
 {
 horServo.write(pos);
 delay(positionwait);
 }
 delay(delaySpeed);

// Look neutral
 for(pos = horMaxLeft; pos<=horMid; pos+=horStep)
 {
 horServo.write(pos);
 delay(positionwait);
 }
 delay(delaySpeed);

// Look Up
 for(pos = verMid; pos <= verMaxDown; pos += verStep)
 {
 verServo.write(pos);
 delay(positionwait);
 }
 delay(delaySpeed);

// Look down
 for(pos = verMaxDown; pos>=verMaxUp; pos-=verStep)
 {
 verServo.write(pos);
 delay(positionwait);
 }
 delay(delaySpeed);

//Look neutral
 for(pos = verMaxUp; pos <= verMid; pos += verStep)
 {
 verServo.write(pos);
 delay(positionwait);
 }
 delay(delaySpeed);
 }