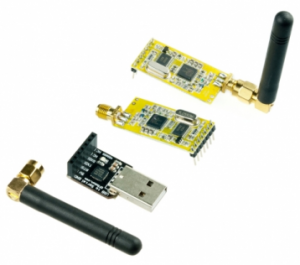
The Arduino is compatible with a lot of shields and other components. In this project we are going to use an APC220 module connected to an Arduino and the same module with a USB converter. In this example we are going to build an Arduino program and use the Arduino “Serial Monitor” for reading and sending information on the PC.
The APC220 module is sold by DFrobot (http://www.dfrobot.com) and has two APC220 modules, two antennas and a USB converter in the package. This makes it possible to control your Arduino remotely. It has a line of sight distance up top 1000 meter at 9600 bps what is suitable for most projects. The APC modules are small only 38 mm by 19 mm. Power consumption is low 5uA in sleeping mode till 42mA transmitting at 20mW. It’s communicating between the 418 MHz and 455MHz band which can be used freely without licenses in a lot of counties.
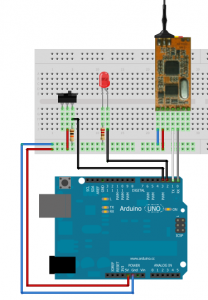
We are going to control a led and read the status of a switch with the wireless connection. The test board has the APC220 module, a switch with a 10k pull down resistor and a led with a 220 Ohm resistor. Everything is connected to an Arduino Uno with an USB power supply to power this project instead of a conventional power supply. We only use 4 pins from the APC220. Two pins to power the module and two pins for sending and receiving information. In the schematics below your see the components on the breadboard made with Fritzing (http://fritzing.org)
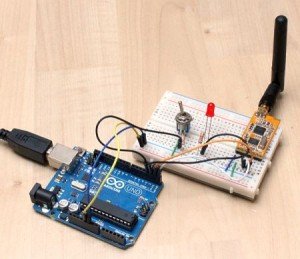
After mounting all the components on the breadboard and connecting the Arduino, you should have something like this.
Compile and Upload the following code onto your Arduino. Before uploading the sketch onto your Arduino you have to disconnect the APC220.
/*
Wireless communication
Original project from https://swanrobotics.com

This project demonstrates wireless communication with an APC220 from http://www.dfrobot.com/

Sending and receiving data between a computer and an Arduino wireless.
On the computer the Serial Monitor from the Arduino software is used.
Control the LED with typing a '1' to turn the LED on and a '0' to turn it off.
The switch will send a message when change state.

The schematics for this project can be found on https://swanrobotics.com

This example code is in the public domain.
*/

// set pins:
const int switchPin = 3; // pin number of the switch
const int ledPin = 2; // pin number of the LED

// variables:
int switchState = 0; // variable for reading switch status
int intSerialVal = 0; // variable for reading Serial Value

// initialize
void setup() {
// initialize LED pin as output:
pinMode(ledPin, OUTPUT);
// initialize switch pin as input:
pinMode(switchPin, INPUT);
// initialize serial wireless communication:
Serial.begin(9600);
// read initial state of switch
switchState = digitalRead(switchPin);
}

// program loop
void loop()
{

// LED control
intSerialVal = Serial.read(); // read user input
switch (intSerialVal) {
case '0':
digitalWrite(ledPin,LOW); // turn LED off
Serial.println("Led Off"); // send message about LED
break;
case '1':
digitalWrite(ledPin,HIGH); // turn LED on
Serial.println("Led On"); // send message about LED
break;
}

// read switch state and print line if state has changed
switch (digitalRead(switchPin)) { // read pin status
case HIGH:
if (switchState == LOW) { // check if message has to be send
Serial.println("Switch On"); // send message about switch
switchState = HIGH; // message has been send
}
break;
case LOW:
if (switchState == HIGH) { // check if message has to be send
Serial.println("Switch Off"); // send message about switch
switchState = LOW; // message has been send
}
break;
}
}
Connect the other APC 220 with the USB converter to your computer.
If you use your APC the first time on a PC you need to install the drivers first. Please take a look at the suppliers website. (http://www.dfrobot.com/)
Select in the Arduino the port for the APC 220 module and open the Serial Monitor in the Arduino software.
You can control the LED by sending a 1 (on) or a 0 (off).
After changing the state of the switch the Serial Monitor will display a message.
I made a video to show you what the program should do. (http://www.youtube.com/watch?v=Ld4hhpFGlww)
If you have a question let me know.


